
November 13, 2026
Getting Your Knees Ready for Ski Season
How to get your knees ready for ski season: when to start conditioning, which exercises to do, how to pace a day on the hill, and what to do if a knee is hurt.
Connecticut's ski season is close. Powder Ridge in Middlefield has posted Winterfest weekends starting Friday, Nov. 27, the day after Thanksgiving, with hours that depend on the weather and conditions.
To get your knees ready, start working on your legs, hips, core, and balance now. The knee takes more skiing injuries than any other part of the body, and most injuries happen after lunch, once skiers are tired (opens in a new tab). A few weeks of conditioning and some sense about fatigue on the hill can help you start the season stronger.
Common knee injuries in skiing and snowboarding
Knee injuries make up 27 to 41 percent of all alpine skiing injuries (opens in a new tab), depending on the study. In 2018, more than 76,000 snow skiing injuries were treated (opens in a new tab) at U.S. hospitals, doctors' offices, and emergency rooms, along with another 53,000 snowboarding injuries.
One of the most common skiing injuries is a tear of the medial collateral ligament (MCL), on the inside of the knee. It can tear when a skier falls downhill with the ski tips pointed toward each other. MCL tears are more common in beginner and intermediate skiers than in advanced ones, and they're typically treated without surgery.
Anterior cruciate ligament (ACL) injuries are very common too, and ACL tears often need surgery, though some people can avoid it. One way they happen is the phantom foot fall: a skier tries to stand up to avoid a fall that's already happening, all the weight goes onto the outside of one ski, and the arms and trunk rotate away from that leg.
In one long-running study at a Vermont ski area, snowboarders got hurt differently: ACL injuries made up a much smaller share of snowboarding injuries than of skiing injuries, and wrist injuries a much larger one. On a snowboard, wrist guards are a good idea, and the advice below about fatigue, rest, and terrain applies to both sports.
Start conditioning a few weeks before your first day out
Give yourself three to four weeks of aerobic training (opens in a new tab), such as walking or riding a bike or an elliptical machine, before a full day of skiing. Begin strength and endurance work four to six weeks before your trip (opens in a new tab). If you're hoping to ski the weekend after Thanksgiving, that's only about two weeks away, so start now. If you're starting out of shape, choose your runs carefully and build up to harder trails gradually.
Build strength in your quadriceps and hamstrings (the front and back of the thigh), your glutes, the muscles on the outside of your hips, and your core. Balance exercises are particularly important because you're skiing on a slippery surface. Stand on one leg on a flat surface with your eyes open, and once you've mastered that, make it harder by closing your eyes or standing on an uneven surface. Add cardio such as biking, rowing, swimming, or stair climbing for endurance.
Knee exercises for skiers: squats, single-leg squats, and side steps
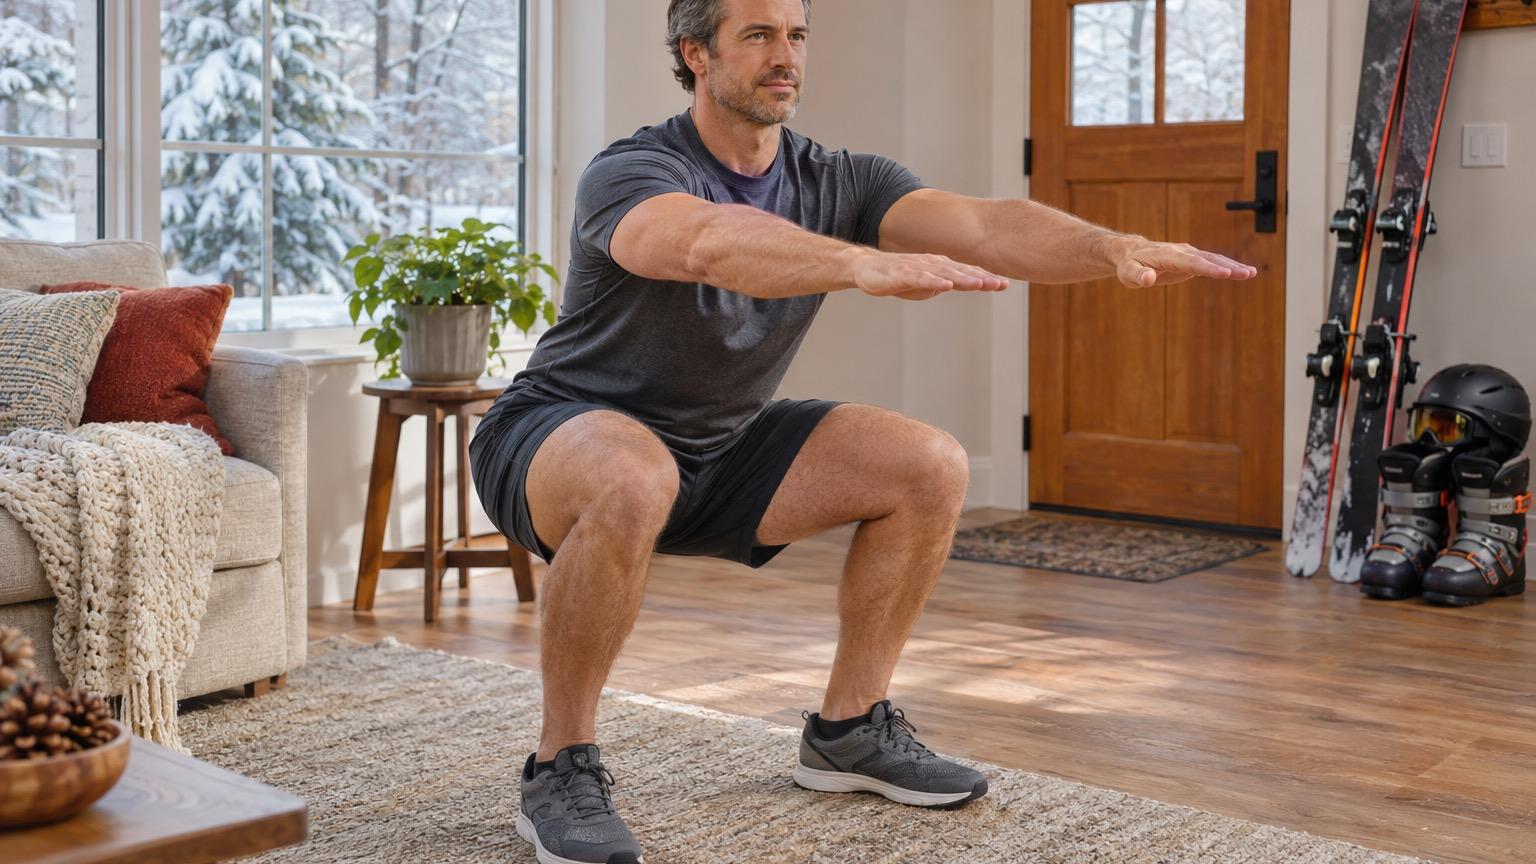
For a squat (opens in a new tab), place your feet shoulder-width apart, keep your feet and knees facing forward, and squat down with your heels on the floor, using your buttock muscles to lower and lift your weight. Do 10 to 15, then hold midway down until your legs are tired, and repeat the set three times.
For a single-leg squat, stand on one leg with a hand or a few fingers on a chair or counter if you need them, and work toward squatting without holding on. As in the squat, keep your heel down and your foot and knee facing forward. Keep your pelvis level, so it doesn't drop on the side of the raised leg. Do 10 to 15 on each leg, and repeat three times.
For a side-to-side step (trainers often call it a skater, after the sideways push of a skating stride), stand on one leg, take a large step to the side onto the other leg, then step back to where you started. Keep your pelvis level and don't let your knee buckle inward, and work up to two minutes; the slower you go, the harder it gets. Finish with a side plank, lifting your hips so your body makes a straight line from shoulders to knees. If your knee already hurts, have it checked by your doctor or our sports medicine team before you start any of these. Stop any exercise that causes pain.
Coming back to skiing after a knee injury or surgery
If you've hurt a knee before, especially skiing, pick your physical therapy exercises back up now, and if you've lost track of them, our sports medicine team can help you rebuild the routine. After ACL reconstruction, a full return to activities and sports often takes 4 to 6 months (opens in a new tab), and sports with quick changes of direction may take up to 9 to 12 months of rehabilitation. Most patients are allowed to return to full sports within 6 to 12 months (opens in a new tab), once pain and swelling are gone and full motion, strength, endurance, balance, control, and use of the leg have returned.
Those timelines cover sports in general. The surgeon or doctor who treated your knee decides when it's ready for skiing, so check with them before your first day back, and ask whether they'd suggest a knee brace.
Pace the day, take a lesson, and ski with a partner
Warm up for 3 to 5 minutes with jumping jacks or by running or walking in place, then take a few slow runs. Many ski injuries happen at the end of the day, when people try to get in one last run, so don't save the hardest trail for after a full day on the slopes. Rest when you're tired, stop if something hurts, take a break every couple of hours, and keep drinking water. At the end of the day, stretch your quads, hamstrings, calves, hip flexors, and glutes, holding each stretch for 30 seconds.
Lessons are especially important for new skiers, and even experienced skiers can improve by taking one. Learning how to fall correctly and safely can lower your risk of injury, too. Never try to stand up during a fall, which is how the phantom foot fall above happens; instead, go with the momentum of the fall and keep good ski technique. If you take jumps, learn to land with your weight forward, and start with simple jumps before harder ones.
Ski with a partner, stay within sight of each other, keep to marked trails, and make sure everyone knows how to get help if someone gets hurt. If you're the parent of a young skier or snowboarder, help them avoid terrain beyond their ability and encourage lessons and regular breaks to rest and drink water. Caution them about speed and about going out of bounds, too.
Ski bindings, helmets, and pads
Buy or rent boots and bindings that a ski shop has set, adjusted, maintained, and tested to industry standards, with the bindings adjusted to your height, weight, and skiing ability. Bindings that are too loose or too tight can cause injury (opens in a new tab), so have your equipment professionally serviced and adjusted every year, and check each binding before you ski. Bindings were designed to protect the shin bone, not to keep the knee from spraining, so don't count on them for your knee.
Wear goggles and a helmet made for skiing, not a bike helmet. For a child or teen, a properly fitted helmet can help protect against a serious brain or head injury, though no helmet is concussion-proof. In terrain parks, wrist guards and elbow and knee pads are recommended too. If you or your child hits your head, call 911 or go to the nearest emergency department (opens in a new tab) for danger signs such as a headache that gets worse, repeated vomiting, or unusual drowsiness or confusion. If a concussion is suspected, stop skiing for the day, and don't go back until a healthcare provider clears you.
What to do if you hurt your knee skiing
Signs of an ACL injury include a popping sound at the time of injury, obvious swelling within 6 hours, and pain when you try to put weight on the leg (opens in a new tab), and with an ACL or MCL injury the knee may feel like it gives out from under you. If you notice any of these, stop skiing for the day and don't go back to sports until a provider has seen and treated the knee. If the injury is serious, don't move the knee, and contact your provider right away. If the foot is cool and blue, call 911, because the knee may be dislocated and blood vessels to the foot may be injured. For a knee that isn't seriously hurt, raise your leg above the level of your heart and ice it until you're seen; our heat or ice post has more on using ice safely.
At home, ice the knee for up to 15 minutes every hour on the first day and at least four times a day after that, with a towel between the ice and your skin, and keep the leg raised to bring down swelling. Contact your provider if you can't bear weight on the knee, the pain is severe even at rest, the knee buckles, locks, or looks misshapen, or the pain is still there after 3 days of home treatment (opens in a new tab); the rest of the reasons to call, including fever and calf swelling, are on that page.
Where Omni fits after an injury and before the season
For a knee that doesn't need the emergency room, our sports medicine team can be your first call. We treat athletes of all ages and levels, from grade school and high school athletes to weekend warriors and professionals, and knee and ankle injuries are among the sports injuries we treat, along with re-injury prevention and return-to-play conditioning. Our chiropractic physicians and physical therapists work on one plan of care, built around getting you back to your sport safely, and when your knee needs it, we can order x-rays or an MRI, or refer you to a specialist. Chiropractic-led sports medicine care does not require a referral. Physical therapy always requires one at Omni, and our chiropractic physicians can refer you in house to our physical therapists. Insurance and what to bring are on our FAQ page.
Before the season, if you'd like a measured starting point for your balance work, our ProPerformance program is at every Omni office and needs no referral. Your first session is a computerized balance evaluation, and your provider builds your plan from there. The evaluation takes about five minutes on the ProBalance 360 and scores your balance and coordination. Performance and balance training is a self-pay service and is not billed through insurance. Our staff can give you session pricing when you call.
Call (203) 562-8600 to book a balance evaluation or to have a hurt knee looked at. Our staff will sort out what applies to you and verify your coverage before your first visit, and you can ask how many sessions could fit before your first day on the hill.